


Organizing Lifestyle Blogger’s First New York City Apartment


Horderly was called in to organize fashion and lifestyle blogger, Olivia Rink’s, New York City apartment. Olivia was downsizing, coming from Chicago, to move into the city for the first time!
Client Goals
Olivia had lots of clothing and makeup products, so we needed to find a functional home for all of these items.
When Horderly arrived, her master closet only had one shelf and hanging rod, so we needed to customize the space and create a design that perfectly housed all of Olivia’s and her boyfriend’s belongings.
There is a height difference between Olivia and her husband, so we needed to be strategic with what items needed to be within Olivia’s reach, and which items could be up higher for her boyfriend.
During

The first task Horderly tackled was pulling out all items from each space, sorting belongings into piles by category, and editing through each item. For example, Olivia had a lot of beauty products so we sorted them on the bathroom floor, and she touched on each and every single item with the help of a Horderly professional organizer.
Once we edited through all of Olivia’s belongings, we strategized placement and started the final stages of organizing her space.
Keep reading to see the before and after of each room in her apartment!
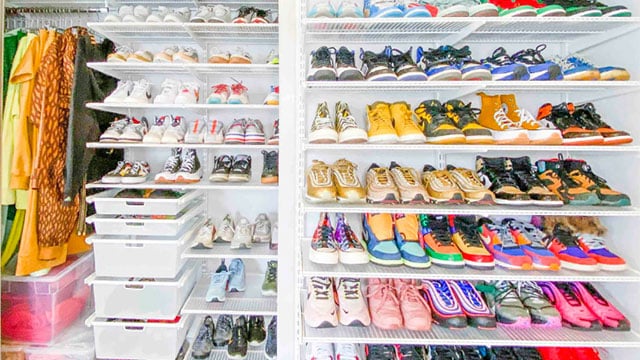
Master Bedroom & Closet


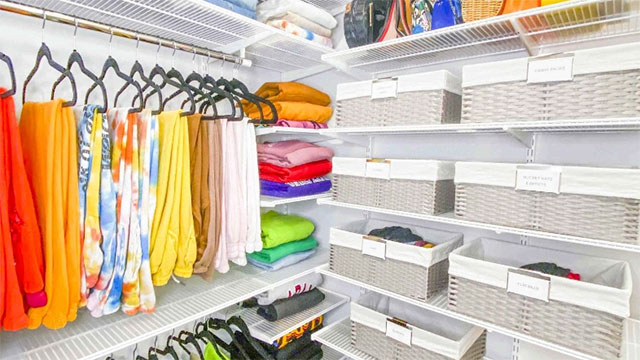
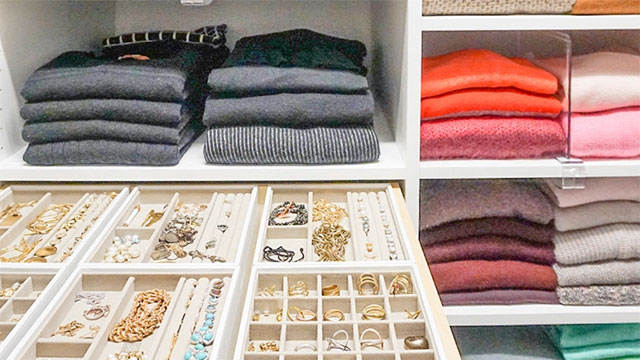
In Olivia’s bedroom, we redesigned her closet space to make it more functional by adding shelving below the hanging space.
We used slim hanger to hang all clothes; the slim design and metal hook allow for easy sliding and storage on hanging rods. We also added rod dividers to separate clothing by category, and shelf dividers to separate the piles of sweaters on the shelves above.
Underneath, we installed ELFA shelving to create three levels of shoe storage. This was super important so that her shoes didn’t land in a pile in the bottom of her closet. The leveled shoe storage allowed each pair to have a proper landing spot.
Master Bathroom


In the bathroom, we used drawer organizers and acrylic shelf risers in the medicine cabinet and deep bins under the sink to create containment for toiletries, makeup and other beauty supplies.
We also added a back-of-the-door system for additional storage, installed at a level that would be easy for the client to reach!
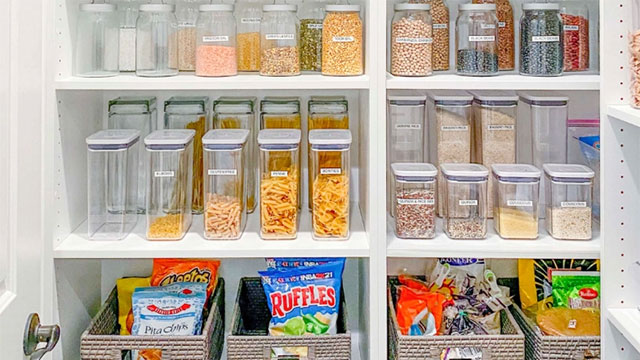
Kitchen


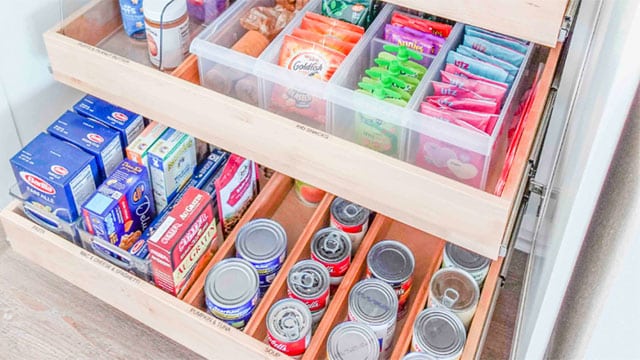
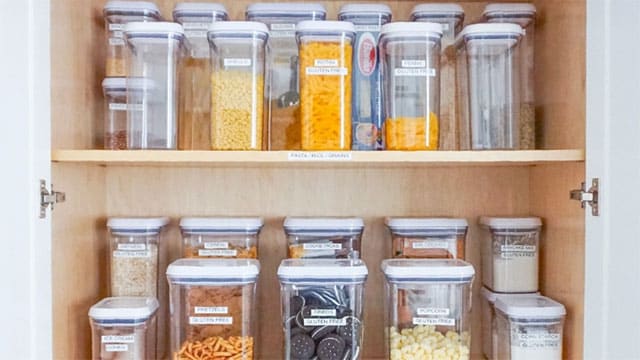
In the kitchen, because the cabinets are super high, we needed to be strategic when placing everyday items that Olivia needed to reach. We kept everyday items on lower shelves or in drawers, and lesser-used items up higher so Olivia wouldn’t be needing to get on a step-stool daily.
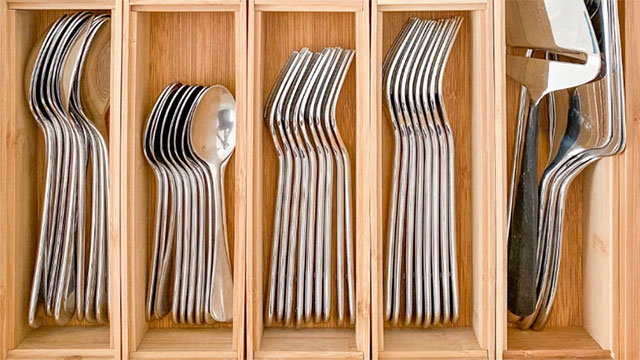
We used shelf risers to maximize the height of the shelving and duplicate more prime real estate on the lower shelves. We also used clear bins to store different categories of food, accessories and cleaning supplies. We used an expanding drawer organizer for utensils and tools. For oils we used a lazy susan, and for spices we utilized a two-tier lazy susan.
Laundry Room

In the laundry room, we utilized the top of the stackable washer and dryer to contain and store laundry-specific cleaning supplies with more deep bins.
Front Closet

The front closet was a shared space between Olivia and her roommate, so we had to organize everything from extra linens, suitcases and travel items, his and hers coats, to winter accessories – and the very important Dyson vacuum.
We used rod dividers to separate jackets by person and an over-the-door system to maximize the back of the door space to contain cold-weather accessories. Backup linens and bulkier blankets were stored on the top shelves of the front closet.
Finishing Touches
Labeling is a finishing touch Horderly adds at the end of the project once everything has a proper home and has been strategized. We label everything from inside of the drawers, to the front of shelves, or bins and baskets so that the client knows exactly where everything is – and so he or she can easily find what they’re looking for, and know where to put it back!
After labeling, it’s time to walk the client through the newly-organized space, show them how we organized their space and why, and teach them strategies to maintain their space once we’re gone.
If you need some extra help but aren’t sure where to start, reach out to Horderly to schedule a consultation for in-home or virtual organizing.
For more information on all things Horderly – including lots of great tips, tricks, and other #HorderlyHabits – check out our blog or reach out for more information!
This content is independently curated by Horderly and may earn us a commission.